Saturday, 7 September 2013

Chutney Cheese Sandwich with Pickled Onions

With September being the start of the academic year (here in the UK at least), it got me thinking about my school lunch box. Kids these days seem to have such exotic palates, growing up exposed to so many different cuisines both at home and when they go out, I can’t imagine they are satisfied with just a sandwich and a piece of fruit anymore. However when I was growing up my packed lunch always begun with a sandwich – cucumber and mustard mainly, sometimes jam, sometimes peanut butter, often the two together (you can tell I had a limited palate). Something between two slices of bread was always the starting point for my lunch box, followed by a box of fruit, packet of crisps, maybe a chocolate or a piece of cake and a couple of snacks for the journey home (I had a very high metabolism – and also very hungry friends on the coach home from whom it was impossible to hide any scrap of food!).

Since those lunch box days I have progressed in the way of sandwich fillings. Now pretty much anything is permitted between any two slices of bread that enter my mouth. This recipe was born in that vein because almost every Indian household will have some green chutney hanging about in their fridge, and naturally anything that is hanging about in the fridge is game when it comes to sandwich fillings. A lot of people will have their own version of this sandwich adding all sorts such as sliced tomatoes or shredded lettuce. But my recipe keeps it classic; simply chutney and cheese.

Chutney Cheese Sandwich with Pickled Onions

However it should be noted this chutney is not your average sweet mango marmalade-ish chutney. This is the real deal chutney, the chutney that my grandmother, like her own grandmother and her grandmothers grandmother too (probably) means when she refers to chutney. It gets its vivid green colour (and name) from the hoards of coriander that it begins with, plus a little extra from the mint I’ve added in for freshness. This chutney is used as a dip for absolutely anything, so even if you're not too keen on the sound of the sandwich, the chutney alone is worth a try.

To make this sandwich properly, the bread you use has to be white. You just won’t get the same crisp lightness on your toast without white bread. A packet of crisps is never too far away from any sandwich but I like mine with a side of pickled onions. They add a satisfying crunch and sharpness to the dish. Furthermore, they really couldn’t be any easier to make.
So if you want to spice up your lunch box here’s how you make my Chutney Cheese Sandwich with Pickled Onions.

Chutney Cheese Sandwich with Pickled Onions (serves 4)

Ingredients for the Chutney
For the Chutney:
1 bunch of corriander, roughly chopped
Approx 30 mint leaves
2 tsp cumin seeds
¾ tsp salt
1 tsp sugar
1 lemon, juice only
3 chillies, or less depending on how spicy you like it
Approx 10/15 roasted peanuts

For the Pickled Onions:
1 red onion, thinly sliced
1tbsp apple cider vinegar
1 pinch of sea salt


To make the chutney, simply add all the ingredients, apart from the peanuts, into a blender. Blitz until smooth. Check the consistency of the chutney. Add the peanuts to thicken if necessary. Blitz until smooth – and the chutney is done. It will keep in the fridge for up to two weeks. Alternatively you can freeze it ready for a later date.


Ingredients for the Pickled Onion


For the pickled onions, simply mix all the ingredients together and leave the onions to pickle in the juices for at least a couple of hours. (If you can make this day before you want to eat it, even better! The flavours develop over time, so the longer you leave it the better it will taste).


To assemble the sandwich simply toast one side of each slice of bread. Spread the chutney on the un-toasted side. Pile on the cheese (grated/sliced – however you like it) and sandwich together. Serve with the pickled onion on the side. This recipe couldn’t be any simpler but still tastes delicious!

Just couldn't help but take a bite!

// Click here PRINT RECIPE //

Until next time...

PS – if you like what you read enter your email address into the box on the side -->. Don’t worry I won’t spam you or anything. You’ll just get an email every time I write a new post. 

Saturday, 24 August 2013

Polenta Chips

Truffle Risotto, Green Papaya Salad with Crispy Onion and Roasted Peanuts, Hot Apple and Almond Crusted Pie with Vanilla Cream. These are just some of the answers I have given in reply to that infamous question, “What is your favourite food?” all foodies get asked. These rich and interesting dishes with complex, layered flavours offer no less than what would be expected to satisfy a foodies taste buds. But in all honesty, if I had to eat Green Papaya salad with Crispy Onion and Roasted Peanuts as my final supper then, well, I really wouldn't die entirely satisfied.

If I were to tell the truth, my ultimate favourite food of all time is the very unrefined, unsophisticated British chip. Actually chip doesn't cut it, because let’s face it no one on this earth can ever stop at one. A grand plate of salted chips would do me just fine; accompanied by an equally grand dollop of ketchup.

Favourite foods are so much more than just taste qua taste. Favourite foods are about the memories those tastes evoke. Every time I eat chips I am taken right back to my entire childhood - mainly because I spent most of my childhood scoffing my face with chips. And those were happy, happy days.

I remember being in Canada, on a kids adventure with my brother and two cousins. We were on our way to a theme park all squashed together in the back of a car with a Canadian relative. Well prepared, he had packed some snacks in his backpack to keep us going for the journey. He asked “Does anyone want any chips? I have some in my bag.” My face lit up. I couldn't believe it. How had he managed to pack fresh, hot chips into his backpack? I was a little dubious. But then I thought ‘Canada is an entirely different country, miles away from England; maybe they have innovative solutions for packing hot foods into backpacks. What else could have meant by chips in his backpack?’ Alas, you can imagine my disappointment when he brought out a bag of crisps. Of course what I was dreaming of were what the Canadians call fresh, hot fries - I was completely lost in translation!

Polenta Chips
So, with a nod to my ultimate favourite food this week I have decided to share my recipe for Polenta Chips – a slightly more refined, sophisticated Italian cousin of the great British chip. These chips are packed full of flavour. The polenta gives the chips a soft interior and crisp exterior once they are fried. And rather than ketchup, I paired my Polenta Chips with Italian tomato sauce – the kind you would make with pasta. Semplice e delizioso!

Polenta Chips (serves 4)

100g polenta
530ml water
100g cheddar cheese, grated
2 small chillies, finely chopped
2 cloves garlic, finely chopped or grated
A large handful of parsley, finely chopped
2 tbsp olive oil

//Click here to PRINT RECIPE //


Chopped chilli, garlic, parsley


Finely chop the chillies, garlic and parsley. Fry for 3 minutes until the parsley shrinks and darkens in colour.


Pouring in Polenta in a stream

Boil the water. Once it is bubbling pour in the polenta in a stream stirring constantly. Do not add all the polenta in one clump as it will be difficult to un-clump it once it hits the water. Keep stirring until the polenta is cooked through. This will take about 5 minutes.

Add in the cheese and mix in the cooked parsley, chillies and garlic. Season with a pinch of salt and stir all the ingredients together. At this point the polenta can be eaten just as it is, serve in the same way you would mashed potato.

Cooling Polenta


But to make the chips, you have to let it cool completely. To do this, pout it out onto a chopping board, or wide plate or tray. Leave until completely cooled. This will take at least 30 minutes.


Shallow frying Polenta Chips


Once cooled, cut into chips. (I absentmindedly cut mine into oblongs instead of chips – but they tasted great all the same!) Shallow fry in a little oil, turning so that each side hits the pan and it is crispy on all sides. Serve with tomato sauce, or just as they are.


Until next time...

Sunday, 11 August 2013

Beetroot Salad with Roasted Sweetcorn and Mint

Recently I have transitioned from an 8 hour working week as a student to a 9-5 real-world working girl. And what a slap in the face waking up to an alarm at 7.30 every morning is. Especially after 3 years of having the choice of whether to wake up for a class at 9 or.. just attend another one later on, and no alarm! Having said that, I don't have it anywhere near as bad as half of my friends. But still, I am in mourning over my loss of those long gone luxuries of student life.

One of the things I will miss a lot is a long lunch. I used be able to order a pot of tea, and have time to sit there and get a re-fill. But now I have to be much more efficient with lunch. Although, that might be a bit of an exaggeration because it was a long lunch, at a restaurant serving interesting, healthy and really delicious salads (Ottolenghi), on my first day of work that gave me the final bit of inspiration for this Beetroot Salad with Roasted Sweetcorn and Mint.

Beetroots are everywhere are the moment. August is their season. You can get them ready cooked any time of the year. But now is the time to buy them raw. The rewards of cooking them yourself are truly great. Thier flavour intensifies as they bake/steam slowly in their own juices. They are paired with a cooling yoghurt dressing that turns the most beautiful colour as the beetroot juices seep into it - this salad needs to come with a warning for turning your lips pink!

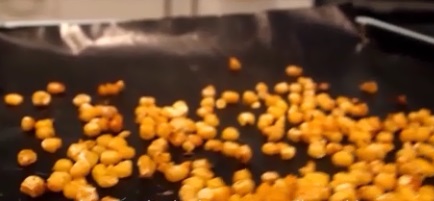
Roasting sweetcorn for the salad was an epiphany. Crispy and crunchy yet still sweet and juicy inside. Roasted sweetcorn is a dish transforming addition to any recipe. This salad is vibrant and tasty and tastes even better the next day - perfect for any lunch box!  I took some for lunch paired with this bread.

Beetroot Salad with Roasted Sweetcorn and Mint (serves 4)
3 large beetroots 
2 cloves garlic
200g sweetcorn
150ml yoghurt
½ tsp Cumin
½ tsp Paprika
½ tbsp Olive oil
1 tsp Extra virgin olive oil
A handful of mint leaves

// Click here to PRINT RECIPE //


Beetroot Salad with Roasted Sweetcorn and Mint

Start by washing your beetroot thoroughly. Wrap loosely in foil with the garlic cloves. Make sure that there are no gaps to ensure your vegetables cook in their own steam. Place on a tray in case any juices escape, and place in a preheated oven at 190˚c for 1 ½ hours. It’s a long time, but honestly the beetroots take on the most wonderful flavour cooking in their own steam. Much better than the beets you can buy ready cooked.

Once cooked, remove the beets from the oven and open their foil package. Double check they are cooked all the way through using a knife. (You are looking for a knife to easily pierce through to the centre of the beetroots – the time this takes will vary according the size of your beets.)

Roasted Sweetcorn

Next roast the sweetcorn. Coat the sweetcorn in ½ tbsp of oil, ¼ tsp salt, ½ tsp cumin and ½ tsp paprika in a bowl. Then tip out onto a baking tray and bake in the oven for 10 minutes at 190˚c.


Whilst the sweetcorn is roasting, make your yoghurt dressing. Pass the yoghurt through a sieve to ensure your dressing is smooth and lump-less.  Squash out garlic clove from its skin and use your knife to smooth into a paste. Add this to the yoghurt. Season with a pinch of cumin and stir together.

Beetroot Salad ready to be dressed
Peel and slice your cooled beetroot into rounds, about 1cm thick and arrange on a plate (as fancily as you like). Lightly drizzle some good quality, extra virgin olive oil over the beets and season with a small pinch of salt.

Once your sweetcorn is done you are ready to assemble. Simply spoon the yoghurt dressing over of the beets. Scatter with roughly torn mint leaves and handfuls of crispy sweetcorn. This dish is best served at room temperature.


Until next time...


Saturday, 27 July 2013

Apple, Walnut, Cheddar Cheese Bread & Honey and Sesame Seed Bread

No-knead, no-rise, no-yeast bread in 40 minutes start to finish? Yep, you’d better believe it. When I first saw this recipe here I couldn’t believe how easy it was. Bread is usually a long processes involving waiting around, for a couple of hours at a time, to give your yeast a chance to prove (any bread buffs out there – get the pun?!) that it is alive and kicking (what an attention seeking little so and so!). No-knead, no-rise, no-yeast means no waiting...at all.

Whilst the bread is baking in the oven, you have just about enough time to wash up, call some friends round and crack open a bottle of wine. Once this bread is out of the oven, it requires immediate consumption. This is not a dramatic over exaggerated expression of how delicious this bread is. Rather, a slight drawback of taking a short cut in baking. If left to go cold it can be a little stodgy. Of course if you do bake it in advance, I would simply advise warming it up before you eat it.  
On the plus side, this recipe is all about getting creative. Use the basic recipe of said amount of flour, salt, water and olive oil and let your imagination/taste buds do the rest! I’ve tried paprika and chilli, olive and rosemary (as used in the original) and even date and walnut. The ones in this post were my favourite. Sweet apple, crunchy walnut and salty, creamy cheese. Mouth watering already? Mine too! I just love the mix of sweet and savoury. When I go to the cinema, it’s always half sweet and half salty popcorn for me. And as for honey and sesame seed, if you’ve ever tried Jewish breads you’ll know honey and sesame is a tried and tested combination. This bread couldn’t be any easier if it tried. Now there is no excuse for not baking your own!

Apple, Walnut and Cheddar Bread (serves 8)
300g self raising flour
Pinch of salt
2/3 tbsp olive oil
150ml warm water
1 green apple, cut into small cubes
Approx 50g walnuts, roughly chopped
Approx 40g cheddar cheese, grated

// Click here to PRINT RECIPE //


Start by measuring out the flour and pinch of salt. Add the oil, warm water and cheese. (The measurements are quite specific but honestly, if you pour in 1 whole tbsp of oil instead of 2/3 by mistake it’s not the end of the world. The same goes for the water and cheese.) Stir until the mixture comes together using a wooden spoon.


As the dough forms it will start to come away from the sides of the bowl. At this point tip out onto a clean surface. Push the dough around and shape into a flattened circle. Pile the apple and walnuts into the middle of your circle and pull the dough over to cover. Use your hands to try and evenly distribute the apple and walnuts into your dough. If it seems to stick to your hands, add a little more flour.

Shape into a round loaf, by tucking in the edges of your circle underneath (as seen in the video below). Use the handle of a wooden spoon to indent 8 segmentations in the loaf. This will make the loaf easier to cut/pull apart once bakes. Sprinkle some cheese on top for a cheesy crust. And now it’s ready to bake, for 30 minutes at 200 ºc.

Honey and Sesame Seed Bread (serves 8) 
300g self raising flour
A pinch of salt
2/3 tbsp olive oil
150ml warm water
4 tbsp runny honey
3tbsp back sesame seeds
3tbsp white sesame seeds

// Click here to PRINT RECIPE //


Start this is the same way as the other bread. Start by measuring out the flour and pinch of salt. Add the oil, warm water, honey and sesame seeds. (The measurements are quite specific but honestly, if you pour in 1 whole tbsp of oil instead of 2/3 by mistake it’s not the end of the world. The same goes for the water, honey and sesame seeds. If you only have one kind of sesame seed, that’s fine too.) Stir until the mixture comes together using a wooden spoon.

As the dough forms it will start to come away from the sides of the bowl. At this point tip out onto a clean surface. . Push the dough around and shape into a round loaf. Use the handle of a wooden spoon to indent 8 segmentations in the loaf. This will make the loaf easier to cut/pull apart once bakes. And now it’s ready to bake, for 30 minutes at 200 ºc.


I shared my breads with four of my friends at a “bring-a-dish” dinner party at mine, so I couldn’t blog about this recipe without mentioning them. I knew we are all foodies or at least dedicated food consumers (we all went travelling together and came back a lot heavier after two months in each others company!). But I did not realise how many great recipes they all have up their sleeves! Here is a little snippet of our feast, and my God it was a feast!

Ricotta and Roasted Veg Stuffed Pancakes
Mushroom and Pesto Puffs, Camembert, Apple Toast


Tiramisu

Apple, Walnut, Cheddar Cheese and Honey, Sesame Seed Bread 
Cheese Board

The chefs! 


Until next time...


Wednesday, 17 July 2013

Mexican Guacamole and Horchata

For the past three weeks or so I have been impatiently waiting for the right time to pick my chillies. Which, I might add, I grew myself without killing or neglecting. Completely from scratch. This is a huge achievement for me as someone who has seen one too many basil plants die shrivelled and unloved on my kitchen windowsill!

Last autumn I went to a Mexican chain called Wahaca, who very generously give you a gift of chilli seeds as you leave. Those seeds became my babies over the last year. It’s not meant to take chillies that long to grow, but being the novice gardener that I am I didn't think to wait until after winter (the coldest this country has seen in years) to plant my seeds and give them a better chance at life! Then again, I've always been a fan of tough love. Nevertheless, despite my harsh parenting, the chillies have well and truly blossomed (as you will notice in my video below).

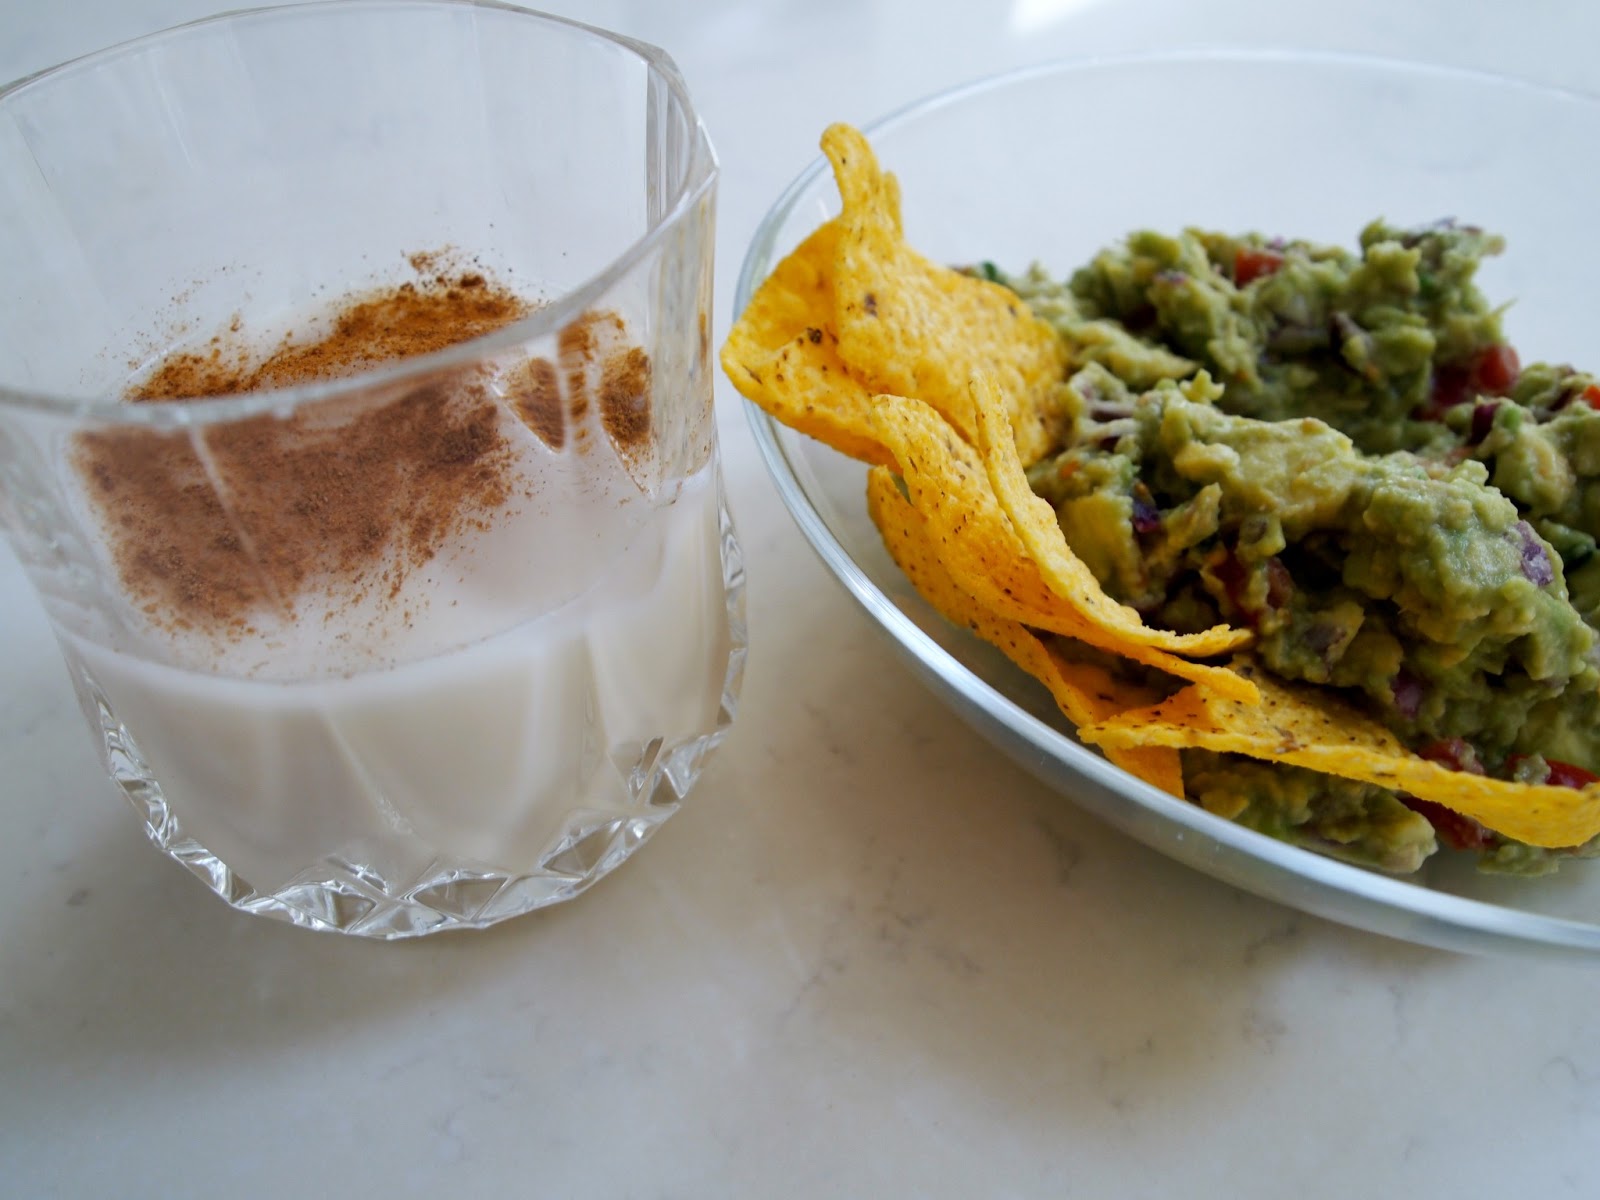
I couldn't think of anything more fitting to make using my Mexican chillies than a Mexican guacamole. And what with this amazing weather here in London, nachos and dips are the perfect way to start off an evening in the garden.

That brings me onto my chosen accompanying drink (because what crisps and dips would be complete without a drink?!) – Horchata. It’s an unusual Mexican drink, made from dry roasted rice, cinnamon mixed with condensed milk served cold with ice. Until recently the only thing I knew about Horchata was that it’s the name of a Vampire Weekend song (as some of you may have noticed by the music from my last videos, I am a Vampire Weekend fan). But alas, Horchata is an authentic Mexican drink, really easy to make and tastes amazing with a drop of rum as suggested in the recipe I followed that can be found here

Mexican Guacamole (serves 4)


2 ripe avocados
5 cherry/baby plum tomatoes or 1 normal tomato, chopped into small dice
1 small red onion, chopped into small dice
2 small green chillies, finely chopped
3/4 tsp lemon/lime juice

Simply add all the ingredients into a bowl and either use you hands or use a knife and spoon to squash the avocado into the other ingredients. Keeping the avocados whole to begin with allows you to add texture to your guacamole. You can add more/less chillies according to taste. This goes for the lemon/lime juice as well. Guacamole is best made fresh right before you want to eat it, and is best served with nachos.


// Click here to PRINT RECIPE //
Horchata (serves 6)


1/3 cup rice
1 large piece of cinnamon
1/2 tsp vanilla extract
340g evaporated milk (about 1 can)
396g condensed milk (1 can)
4/5 cups of water
cinnamon to garnish
ice to serve

Dry roast the rice and cinnamon in a pan over a medium heat. Wait for the rice to turn slightly golden. Keep tossing in the pan to avoid any rice getting overcooked as this will give a burnt taste.

Grind the rice and cinnamon in a blender until they form a fine powder.

Mix all remaining ingredients in a jug and add the powder. Stir well and then drain over a cheese cloth into another jug or large punch bowl. You can use a really fine cloth (as I did) if you don't have a cheese cloth. Refrigerate and serve cold with some ice and cinnamon powder to finish. you can even add a dash of rum when you serve if you wish, trust me this tastes great!


// Click here to PRINT RECIPE //
If you're having a Mexican fiesta any time soon, these recipes are a must!


Until next time...


Friday, 5 July 2013

Summer Lasagne

Summer is here, and it's baking! Stepping outside I almost feel like I'm on holiday. However, if my experience of British summertime is anything to go by, this wonderful weather is probably going to be short lived. So I'm going to make the most of it whilst it's here. And what better way to do that than alfresco dining? This recipe is perfect for just that. Light, rich in greens and clean, summer flavours - this is the perfect summer dish.


If you've scrolled down already, you may have noticed I've tried to do things a little differently this post. I have used VIDEOS! Or more accurately, mini "movies", as the only editing software I have of my computer is the stuff that comes free with Windows and that, apparently, is a "movie maker". So instead of photos depicting my afternoon fun I have five short blockbusters. There ain't no such thing as a free lunch so thanks to my brother and friend for helping me film.

Popcorn at the ready... here's my Summer Lasagne (serves 3 or 2 very hungry people)

5 sheets of lasagne
7 small spring onions, chopped into rings
1 big bulb of fennel, chopped as thinly as possible
300g asparagus
100g broad beans
1 glass of white wine
50g parmesan cheese, grated finely
1 small tub of single cream (285ml approx)
Zest of 1 lemon, grated finely
A handful of fresh parsley, chopped finely
A handful of fennel leaves, chopped finely
1 tbps olive oil
½ tsp salt
½ tsp pepper

Start by brushing each sheet of lasagne with oil (to stop them sticking to each other as they cook), and snapping each in half. Add to boiling salted water to cook as you would normal pasta. Fish out the pasta using tongs, or alternatively you can drain the lasagne sheets as you would normal pasta. They will finish cooking about the same time as the sauce.


Prepare the asparagus by bending each one and letting the tough end naturally snap off. Discard the tough end and wash the remaining part. Put the asparagus on to cook in a pan of boiling salted water. After about 2 minutes add your frozen broad beans. Cook for further 3 minutes and drain.


Next, heat the oil in a pan, and start cooking the onions gently for about 2 minutes. Add the wine and let it reduce for about 5 minutes. Add the fennel and season. Let this cook for 2 minutes. 


Then add the cream, and let it reduce a little. Mix in the lemon zest and parmesan, followed by the fresh herbs. (I have used parsley and fennel leaves because I had these in abundance, you can really use any soft herbs you like or have around.) Finally mix in the cooked asparagus and broad beans and you’re now ready to assemble. 


To assemble this summer lasagne, start with a square of lasagne, followed by a layer of sauce making sure to get some asparagus too, then top with another sheet of pasta. I did 3 layers per person, finishing with an asparagus on top. This was a good amount for lunch, but for dinner you could easily add another layer.


And there you have it, simple and delicious summer lasagne. I hope you've enjoyed the videos and more importantly the delicious recipe!

// Click here to PRINT RECIPE //


Until next time...


Sunday, 23 June 2013

Sweet Potato Gnocchi

Having finished my final exams last week, and having taken a week to do all those anti exam things I was banned from doing for three months, this weekend I came home to enjoy the luxury of our new kitchen – which is fully functioning at last! My favourite part, aside from the seemingly endless worktop space is the boiling hot water tap. The age of waiting for a kettle to boil has passed. Now, any time I want a cup of hot water, which is very often, (here’s a weird fact about me: hot water is my favourite drink, don’t judge!) all I have to do is turn a tap and out runs a loyal stream of boiling hot, drinkable water – perfection!  So, after my failed attempt at making jam (see last post), here’s my first blog post from the new kitchen.

During our exam period, my flatmate mentioned a recipe for sweet potato gnocchi, and my mind has been pre occupied with it ever since. Italians do things so simply, yet for me Italian food is always the most satisfying on the palate. Gnocchi is no exception. It is basically potato pasta but can be heavy and stodgy sometimes, particularly when bought ready-made. (Gnocchi literally translates to dumplings so potato dumplings inevitably have “I am going to make you feel lethargic and sluggish” written all over them!) However, this recipe results in light, fluffy pillows of joy. I have to admit there are several processes to making gnocchi, but none of which require fiddly gadgets or expert skill, only a hand which doesn't mind getting a little messy and about an hour or so to spare. I've frozen some of mine too, so I can enjoy my labour of love at least twice more.


Sweet Potato Gnocchi (serves 4)

600g (or about three medium sized) sweet potatoes
120g strong white bread flour, plus extra for dusting
2 egg yolks
2 tbsp finely chopped chives
2 tbsp finely chopped tarragon
1 tsp salt
1 tsp black pepper

Start by cooking the sweet potatoes. Simply wash them with the skins on, and prick all over with a
fork. Pop them in the microwave for 7 minutes, check to see if they’re cooked all the way through. Cook for a little longer if necessary.

Wait for them to cool a bit then peel off the skins and mash in a large bowl. Wait for all the flesh to cool down to room temperature. (You can speed up this process by putting the bowl by an open window.) Now sift in the flour, add the egg yolks, seasoning and herbs. I have used chives and tarragon but you can use any soft herb you like.


Mix using your hands. It does get a bit messy but persevere. Add more flour if the dough seems too sticky. Once all combined, tip onto a well floured surface and shape into a long sausage.


Cut into pieces, roughly the same size, using a blunt knife. I have no qualms about odd shaped pieces of gnocchi, but if you’re a perfectionist then take your time as you cut. And to add that professional touch, indent each
piece with the prongs of a folk to add a pattern to each piece of gnocchi.


Keep dusting with flour if you think the dough is sticky as you are cutting. You are looking for a soft consistency, but dough that holds together. Place your pieces onto a tray covered in semolina to stop the pieces sticking together.

This is the point at which to freeze some if you wish to do so, simply transfer into a freezer bag with a little semolina to stop them sticking together and bung in the freezer for a later date. I would aim to eat them within two weeks.

To cook your gnocchi, simply add to bubbling boiling water. Let them cook until they rise to the surface (this should take about two minutes). Drain immediately. They can be served like this with some tomato sauce.

Or you can cook them in a little butter to make the outsides beautifully golden and even more inviting. This is what I did. Simply heat some butter in a pan and toss the gnocchi through for about two to three minutes. Serve immediately with tomato sauce and adorn with chives.


And that's it. Simple and delicious sweet potato gnocchi. Next time I might try adding different herbs and spices, this recipe is definitely worth experimenting with!


Until next time...