Tuesday, 23 October 2012

Risotto: the unexpected student food.

So it's been a little (by little I mean long, and I apologise for that) while since my last post. Starting university again has kept me busy. And it being my third year, it has been busier than ever. However, every student knows, working hard and playing hard requires fuel, and there is only so much pesto pasta one can tolerate. Having said that I do have a brilliant recipe for the ultimate pesto pasta, a jazzed up version of that pesto out of a jar... but I'll save that for a lazy day blog!

This time my focus is on risotto. Risotto doesn't exactly have the easy student food reputation, more like the posh dinner that the parents have got covered. But believe it or not, I think risotto is the perfect student grub and I think I make a pretty good case as to why...

1. Risotto is a vehicle for flavour - you can add literally whatever you like/ have hanging about your fridge.
2. Risotto is really really filling. It is fuel for economizers, that is, a little goes a long way.
3. It's a store cupboard ingredient. Buy it, keep it in the cupboard, and it will stay there, mould free, for an age.
4. Leftovers can be rustled up into the most delicious Italian snack (or meal, depending on how much you've got left over) where you really don't feel like you are eating yesterdays food. (As shown below)

So for my first meal, when I moved back into my student flat at the end of summer, I made this risotto:


And all you need is:

1 or 2 shallots (or an onion/a few spring onions), chopped finely
1 and 1/2 handfuls of arborio risotto rice per person
about 1 pint vegetable stock per person
1 handful of vegetables per person - I used mushrooms, but courgettes, sweet peppers, roasted Mediterranean vegetables, seafood (basically anything will do)
a couple of tbsp of butter
a handful of parmesan cheese 
1 handful of fresh herbs, chopped finely
a glass of dry white wine (optional), if you don't have this squeeze a little lemon, or a dash of white wine vinegar as a substitute

Start by sweating the shallots gently in a wide based, shallow pan. Cook until they are translucent. Then stir in the rice with the buttery shallots, ensuring each grain is coated. At this point, splash in your wine, or whichever substitute you are using. Cook on a medium heat. Once the wine is totally absorbed, add in your vegetables if they are raw. If the vegetables you are using are already cooked then do not add them yet, save them until  the end, once the rice is cooked.

Now pour in a ladle or two of the stock, stir in gently, but there is no need to keep stirring constantly (as most recipes instruct). Just make sure you are cooking on a medium heat. Once the stock is absorbed, add in a couple more ladles. Keep repeating this process until all the stock is absorbed, this should take about twenty minutes. If you finish all the stock but the rice is still not cooked, just add some boiling water. 

Once the rice is cooked, stir in your fresh herbs, cheese and a knob of butter. Check for seasoning (in this recipe it is best to season at the end, because the stock and cheese will both contribute to the salt content), just add to taste.
At that's it, it is ready to serve!

Now for the leftovers. 
This is a dish I fell in love with on my last day in Rome this summer: Arancini, my last taste of Italy before I got on the plane back home to London. It basically a risotto ball, coated in crispy breadcrumbs. Crispy on the outside and unctuously smooth on the inside. Perfection! 
That's the Italian version... and here's mine:
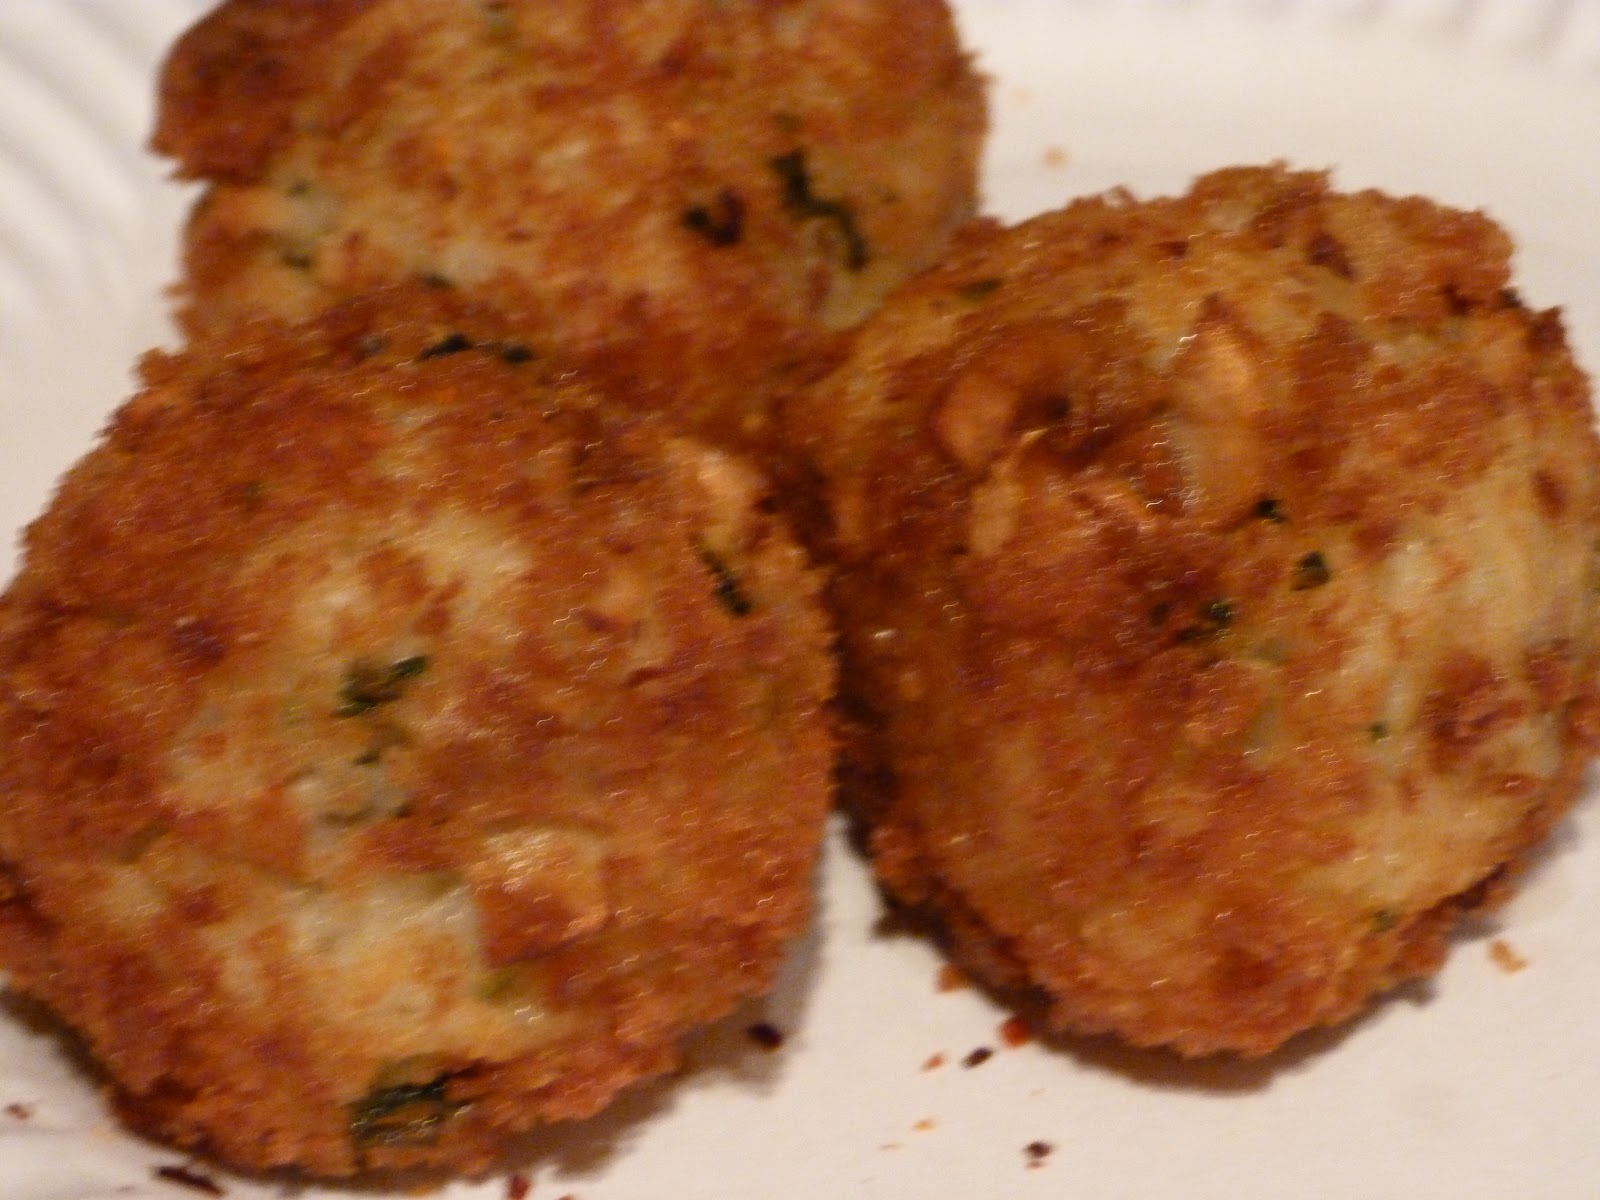
To make these, all you need is some leftover risotto, breadcrumbs (I just bought mine from the supermarket) and some olive oil. 

Simply use your hands to mould the cold risotto into balls. Roll each ball in breadcrumbs, making sure they are fully and generously coated. Heat enough olive oil in a medium to shallow frying pan, so that each arancini is about an inch deep in the oil. Make sure the oil is not too hot, you will know when the oil is ready when you drop a breadcrumb in, it will sizzle and turn golden within a minute. 
You are just looking for the outside of the arancini to turn golden brown and crispy, as inside the risotto is already cooked. Once, they're done, drain on kitchen paper and serve immediately, arancini are best enjoyed warm.

So there you have it, risotto. The unexpected student staple. 


Until next time...


Wednesday, 3 October 2012

Indian Tartiflette

So this week I thought it's about time I paid homage to my Indian roots. My mum for one was slightly offended Indian food has yet to feature in any of my posts! It's not that I don't love Indian food, I do. But it's just that most of the time I do eat anything Indian, it's something I've had a million times before. Indian food ceases to surprise me. (Having said that, it's probably partly down to the fact that I hardly ever eat Indian food out.) Indian food is something I eat at home, and have done for my entire 21 years! Furthermore it's something my Mum, Aunts and Grandmas do so expertly, why would I try to mess with that?!

When I cook, I prefer to cook something experimental. Often something I've never cooked before trying to replicate something I've seen, tried, heard about. Hence my first Indian food post is actually an Indian twist on a French classic, tartiflette


Tartiflette are basically cute, little potato and cheese nests: crispy, chewy and the perfect moreish snack. Traditionally they are made from potatoes, lardons (pieces of smoky, fatty pork) and  Reblochon cheese. I was tempted the moment I heard about these! To make something so obviously French, (I mean it contains super stinky cheese, makes no apology for the butter necessary to bind it all together and is full of lardons. Carb central!) Indian, well, all I had to do was add the most obvious Indian ingredient: spice!


Here's how they're made...

450g potatoes (about 4/5 average sized potatoes), shredded/grated
1 white onion, chopped finely
1 garlic clove, minced
1 inch piece of fresh ginger, minced/grated
1 green chilli, chopped finely
100g or so of cheddar cheese, cubed
a handful of coriander, roughly chopped
1/2 tsp cumin seeds
1/2 tsp mustard seeds
2/3 curry leaves
1 tbsp vegetable oil
1/2 a lemon

Start by draining the water out of the potatoes. Put all the shredded potato in a tea cloth and squeeze out as much moisture as you can. Add a little salt to the potatoes to help draw out the moisture.
Next, put the oil in a pan over a medium heat. Add the cumin, mustard seeds and curry leaves, let the spices infuse the oil until the seeds start popping. At this point, add the onions and cook gently, so that they soften not brown. After about 5 minutes, add the garlic, ginger and chilli. (Adjust the amount of chilli you put in according to your taste and the heat of the chilli. If you don't like hot spice, take out the seeds as they are what gives the chilli its real heat.)
This is a good point to season the mixture with salt to taste, I would say at least 1/2 tsp is necessary. Once the garlic, ginger and chilli have cooked for 2 minutes, switch off the heat. Mix in the potato, cheese and coriander. The amount of cheese you add is your prerogative, I know French recipes would call for at least about 250g!


Spoon into the greased muffin tins (grease with oil or butter, grease really well to ensure your tartiflette come out with ease post baking). Bake at 180 degrees for about 20 minutes or until golden and bubbly. 

To serve, I suggest tamarind or mint and coriander chutney. Believe it or not these taste exceptionally good with a healthy dollop of tomato ketchup! And there you have it, Indian tartiflette.


Until next time...


Tuesday, 25 September 2012

Delicious Doughnuts


OK, I have to admit this recipe is not strictly my own. But that's because making doughnuts is a bit like baking; that is to say you have to get the measurements right. Having said that, I did replace fresh yeast with quick action dried yeast (I mean, who can honestly be bothered to source fresh yeast. If any one has seen it readily available in their local supermarket or deli please let me know!). Other than that I stuck to good old Gordon Ramsay's recipe which can be found here.  

(If you too cannot get hold of fresh yeast and want to try this recipe, I found out (thanks to google) that you need a third of the amount of dried yeast to fresh yeast. So in this case, 5g of dried yeast instead of 15g of fresh yeast.)


All in all following this recipe was pretty simple. The only thing is, it does take a bit of time, what with the dough needing to prove, twice. But this is a great recipe to try on a lazy Sunday afternoon or when you have some time on your hands.
I squeezed in a long Sunday lunch with the first hour and half proving time. And roped my brother in to help in the second, half hour proving. It wasn't hard to persuade him with the scent of deeply chocolaty ganache wafting through the house. In fact the ganache was so good (and was also proving a little tricky to insert far enough into the cooked doughnut) that we made at least three insertions of chocolate into each doughnut!


In his recipe, master Ramsay calls for 170°C oil. Of course, I have no idea exactly how hot my oil was when frying. I may be a kitchen enthusiast but have yet to acquire all the chefs gadgets and gizmos, and hence do not own a cooking thermometer. However, I did find that keeping the gas on a very low setting (BUT not quite the lowest) ensured full and even cooking. I cooked them a little longer than the suggested 3 to 4 minutes to obtain the soft, fluffy interior that characterises a doughnut. 

One other slight change I made to the recipe was the omission of malt powder. Instead, I switched the malt powder for cinnamon. This recipe is very versatile in that you can be creative with the filling. I will certainly be trying it again; perhaps with a lemon curd filling or sweetened apple puree, jam or even just plain simple doughnuts. A very adaptable treat for a sweet occasion, and my god are they delicious!


Until next time...


Saturday, 22 September 2012

Miso Soup

Yesterday marked the unofficial end of summer. Yesterday we... reluctantly turned the central heating on. Mind you, it was only for one hour, but still; it was switched on. For me, that is a sure sign that winter is on its way. Nights are drawing in earlier, the wind is gustier, the air, crisp and autumnal. And it's cold. Sadly the time has come to say bye to the BBQ and hello to hot chocolate. 

Typical winter food is hot, hearty, filling but often stodgy. One of my favourite things to eat when I need warming from the inside out is simple, comforting, hot soup. Every cuisine has its own soup recipes. They are so easy to make, can be a good way to use up left over veg, and are mostly very good for you. 


This week I decided to expand my soup repertoire and try making Japanese Miso soup. It is such a healthy soup, there is hardly any fat in it at all. Miso soup is comprised of a hot miso broth poured over noodles and lightly stir fried veg. (To make it even healthier, and to save on the washing up, you could even skip stir frying the veg and keep them raw allowing the broth to cook them gently). If you have never tried miso, you must! It has a distinct, unique savoury flavour, and is found in lots of delicious Japanese food. Nowadays it is really easy to get hold of miso paste; often is comes in sachets made specifically for miso soup. I bought a tub from the supermarket, an investment for those cold wintery days when you need something simple, easy to prepare and delicious to eat. 


This is my version of the soup, but really it is just the broth that makes it miso soup. You could vary the vegetables according to what you've got, swap the tofu for meat or seafood, and even leave out the noodles if you want to make it an even lighter dish.


Miso Soup (serves about 6 people)

Miso broth:
2tbsp miso paste
2tsp/2 cubes vegetable stock
soy sauce (to taste, you will need at least 1tbsp)
approx 2 to 3 litres of water
Simply dissolve the miso, vegetable stock and soy sauce in the water and leave to simmer until the other components of the soup are ready. 


Vegetables, tofu and noodles:
1/2 leek, roughly chopped
1 red onion finley sliced
3 large garlic cloves roughly chopped
2 courgettes, chopped into thick chunks
8 or 9 (a supermarket box) shitake mushrooms cut into thick slices
approx 100g (half a pack)fresh spinach, roughly chopped
a good handful bean sprouts
soy sauce
1 pack firm tofu, cut into large cubes
250g noodles (I like soba, but you can use whichever variety you want)
3 spring onions, chopped finely to garnish

Stir fry the the leek and onion in a table spoon of oil for 1 minute. Add the garlic, courgettes and mushrooms and continue frying for another minute or 2. Pour in a generous splash of soy, stir in with the heat still on. Turn off the heat and add the vegetables to the soup. 

(Or if you are serving the soup later, just decant the veggies into a large bowl). Add in the spinach and bean sprouts. (Or sit them on top of the stir fried veggies if you are serving later, so that they don't cook). 
It is important not to let the vegetables cook too much, as once they are in the hot broth they will soften immensely. If they are cooked too much, they will be soggy and unpleasant to eat. As I said earlier you can even not cook the vegetables at all, and simply let the broth cook them slightly for you.

It is also unnecessary to cook the tofu. However if you like crispy tofu you can fry it in hot oil. (Top tip: pat the tofu dry with a paper towel before frying to ensure a really crispy finish. Also, water and oil do not mix well. Patting dry the tofu before frying is a safer way of cooking). 

Finally, cook your noodles according to the packet instructions. Once cooked, drain and rinse using cold water to stop them cooking any further.


To assemble the soup:

    
Place a portion of noodles in a bowl. Add the vegetables and tofu to the hot broth, and ladle generously over the noodles. Garnish the dish with a good sprinkling of spring onion. (Don't think the spring onion is a superfluous decoration. No. It is an important finishing touch that will add crunch and freshness).

And that's it! Simple, and delicious. 


To make a real meal of it, I made these Chinese Dumplings as a starter. However, this time I used a different filling mixture.


Mushroom, Spinach and Sesame seed:


8 or 9 chestnut mushrooms, chopped finley

100g (half a pack) spinach, chopped finley
2 garlic cloves, grated or minced
soy sauce
shaoxing rice wine vinegar
toasted sesame oil
handful of sesame seeds

Start by stir frying the mushrooms in a wok, add the garlic after about a minute and continue to stir fry on a high heat until most of their liquid has evaporated. Add a good splash of soy and the vinegar (adjust to taste later). Then toss in the spinach and sesame seeds. Cook until most of the liquid has disappeared. Turn off the heat and drizzle in a little sesame oil. 


So that was my delicious feast from the east. A warming, healthy and delicious way to ease into the winter months.


Until next time...


Saturday, 15 September 2012

Lime and Chocolate Cheesecake


My philosophy for making desserts is simple. You just need three elements: something crunchy, crispy or crumbly, something smooth and creamy and finally something fruity or zesty and/or chocolaty. (I say and/or because there are some cases where chocolate is most definitely welcome in addition to fruit and others where the addition of chocolate would simply destroy a dessert, for instance apple pie with vanilla ice cream, my absolute favourite, in my opinion adding chocolate to this would ruin the perfection. Take note anyone who’s looking to get in my good books!)  And that’s it. Just three simple elements to make a delicious dessert.

So with this philosophy in mind, I give you my Chocolate and Lime Cheesecake.


The first time I made this was for a dessert evening at my cousin’s house. She was leaving for university the following morning all the way to Manchester (from London), so we could call this her send off party.  Let me tell you, not following a recipe when making cheesecake for a group of people is a bad idea. The ratio of cream cheese to cream is of the utmost importance, obviously. Get the balance wrong and you could end up with a sloppy, creamy, slush sat on top of a lovely, crumbly biscuit base (it’s quite difficult to get the base part wrong), unbeknown to you until you free it from the sides of the cake tin, by which point it’s too late.  Well, as you’ve probably guessed, this is exactly what I did! Thankfully, my family were kind and only had praise for the unusual flavour combination and crumbly chocolate base.

I have learnt my lesson and since that evening I did some research and test runs to find the right combination of cream cheese and cream to ensure the cream layer sets.  So if you want to try a more interesting cheesecake recipe than the usual lemon or chocolate cheesecake, give this recipe a go.

For the chocolate base (crispy, crumbly and chocolaty):

50g melted butter (I just do this in the microwave)
250g chocolate biscuits (whichever take your fancy, I like Bourbons)
3.5inch radius base cake tin either with spring sides, or a base you can lift out. (Obviously, if you do not have the exact measurement or tin, it's not the end of the world. But being able to remove the cheesecake from the tin adds to the presentation when serving.)

Crush the biscuits either by hand or in a blitzer (I'm not sure what the technical name is, but one of those machines with a blade that spins around). Blitz/crush until the the biscuits are transformed into chocolate sand. Pour in the melted butter slowly, add just enough until the crumbs resemble wet sand. Add more if you feel the mixture needs it, but you definitely should not need more than 75g of butter. 
Now tumble the mixture into the base. Use a flat bottomed cup or glass, with a sheet of greaseproof paper to press the mixture down into the tin. Note: try not to over press the mixture, else you will end up with an extremely dense base which can be difficult to cut and is unpleasant to eat.


For the lime and cream part (creamy and zesty):

400g Philadelphia full fat cream cheese, at room temp
300ml whipping cream whipped until stiff
2 limes, their juice and zest
3 or 4 tablespoons icing sugar
1 square of dark chocolate for decorating

Start by whipping your whipping cream. Separately, whip up the Philadelphia cream cheese slightly, with as much icing sugar as you prefer, using a whisk. Fold into the whipped whipping cream with the lime juice, and half the lime zest. You may not need all the lime juice depending on the size of the limes. You need about 25ml. Make sure the cream is well combined. 
Spread the cream evenly over your biscuit base (make sure you've removed the greaseproof paper you used to press the biscuit base - that would be a disaster!). Decorate by sprinkling the rest of the lime zest along with grated chocolate over the top. 

Leave in the fridge to set, and an hour and a half later it will be ready to eat. Easy! 

I hope you enjoy this recipe and give it a go.


Until next time...


Friday, 7 September 2012

Boring Bruschetta

Everyone loves bruschetta. A toasted slice of bread usually topped with tomatoes, maybe a bit of onion, garlic and of course good olive oil and basil. It is a staple on any good Italian restaurant menu and its simplicity is what makes it so delicious to eat. 
Unfortunately the humble bruschetta made its own bed and lay in it. Its simple ingredients can make it seem boring and unimaginative. I mean really bruschetta can be compared to beans on toast, cheese on toast. Hell! We may as well compare it to the mundaneness of melting butter on toast! They're all, at the end of the day, just a bit of toasted bread with something desirable thrown on top. So, how is it that we find so much pleasure in such seemingly boring recipes? 

Well, I think the magic is in attention to detail. Perfectly cooked beans, bread sliced to the right thickness etc. 

For now, I will restrict my attention to the detail of bruschetta, and share some of the ways I think you can make "boring bruschetta" something more special. 

And the detail starts with the bread...


Ciabatta to be precise. It has the perfect, airy and slightly chewy texture with a good crust. 

Cut to about 2/3cm thickness and lightly brushed with olive oil
To get the best, slightly charred, flavour I like to toast the bread on a griddle pan but sticking them under a grill works fine.
And finally, once toasted on both sides, I take a peeled clove of garlic and rub it onto one side of the bread.

Now for the toppings...


Original Tomato and Basil:

2 tomatoes, deseeded and evenly diced
a handful of basil leaves finely chopped
1 garlic clove
chilli flakes
1/2 tablespoons olive oil


It is important to deseed the tomatoes else your mixture will be too wet. Then simply combine all the ingredients, seasoning with salt, chilli flakes and pepper to taste. Add the olive oil depending on how big your tomatoes are such that each piece of tomato is lightly coated. 

Feta, Mint and Peas:


1/2 cup cooked and cooled mashed peas
1/4 cup feta cheese
a small handful of mint leaves finely chopped
a little olive oil

Simply combine the peas and feta together in a bowl, add  a generous amount of mint and a little olive oil so the mixtures melds together. Note that the proportions of peas and feta are very flexible, add more peas to make it sweeter, more feta for a saltier flavour. But the mint is essential to make the mixture taste fresh.


Mozzarella, Courgette, Fennel and Orange:


1 mozzarella ball

1 courgette ribboned
1 fennel bulb sliced thinely
1 orange
1 lemon
olive oil

Slice the mozzarella and keep aside. Ribbon the courgette into a bowl using a potato peeler, add the fennel. Zest the orange into another bowl, add its orange and the juice of half a lemon. Add a pinch of sugar, salt and a sprinkle of black pepper. Drizzle in enough olive oil to make a dressing (probably about 2 to 3 table spoons) and whisk together. Now, dress the courgettes and fennel with the liquid, don't add it all at once, but just enough to ensure they are nicely coated. 

To assemble the bruschetta, top the bread with a slice of mozzerella and then the courgette and fennel salad. 

Ricotta, Tomato, Chilli and Mint:


1/2 tub of ricotta cheese

1/2 red chilli finely chopped
a small handful of mint finely chopped
1/2 a tomato deseeded and evenly diced

Simply combine all the ingredients so that the tomato, mint and chilli are evenly distributed in the ricotta. Season to taste with salt and pepper. Of course, if you don't like spice, you don't have to add as much chilli or alternatively you can add more if you like things hot! I think the chilli works brilliantly against the coolness of the creamy ricotta.   


And there we have it, simply delicious bruschetta!


//Click here to PRINT  RECIPES //

So the perfect bruschetta does take some effort. You can keep it simple or jazz it up with unusual toppings. Despite its simplicity I hope I have shown bruschetta does not have to be boring. 


Until next time...